
Solar power has fascinated me since I was a child. I remember playing with solar-powered calculators and eventually disassembling old/damaged things with solar panels to collect them. Obviously the amount of power that can be harvested from such small panels is minuscule, but they were fun to experiment with. Now I’m at a point in my life where I can afford to experiment with solar energy at a larger scale, both for the renewable energy aspect and for a backup when the grid power goes out.
Beginning my foray into house-scale solar power, I didn’t really know what I was looking for, but I did know the approximate peak power consumption of my house and how much various appliances used. I had previously measured almost everything in my house to get an idea of where I was using the most energy. (As it turns out, it’s the dehumidifier in the basement… but I can’t do much about that without lifting the house and replacing the late-1800s stone and mortar foundation). I’ve replaced most of my lights with LEDs and set up a Nest thermostat to reduce my energy consumption where possible. That puts my peak power consumption (ignoring the A/C and dehumidifier) around 500 watts, which is quite manageable.
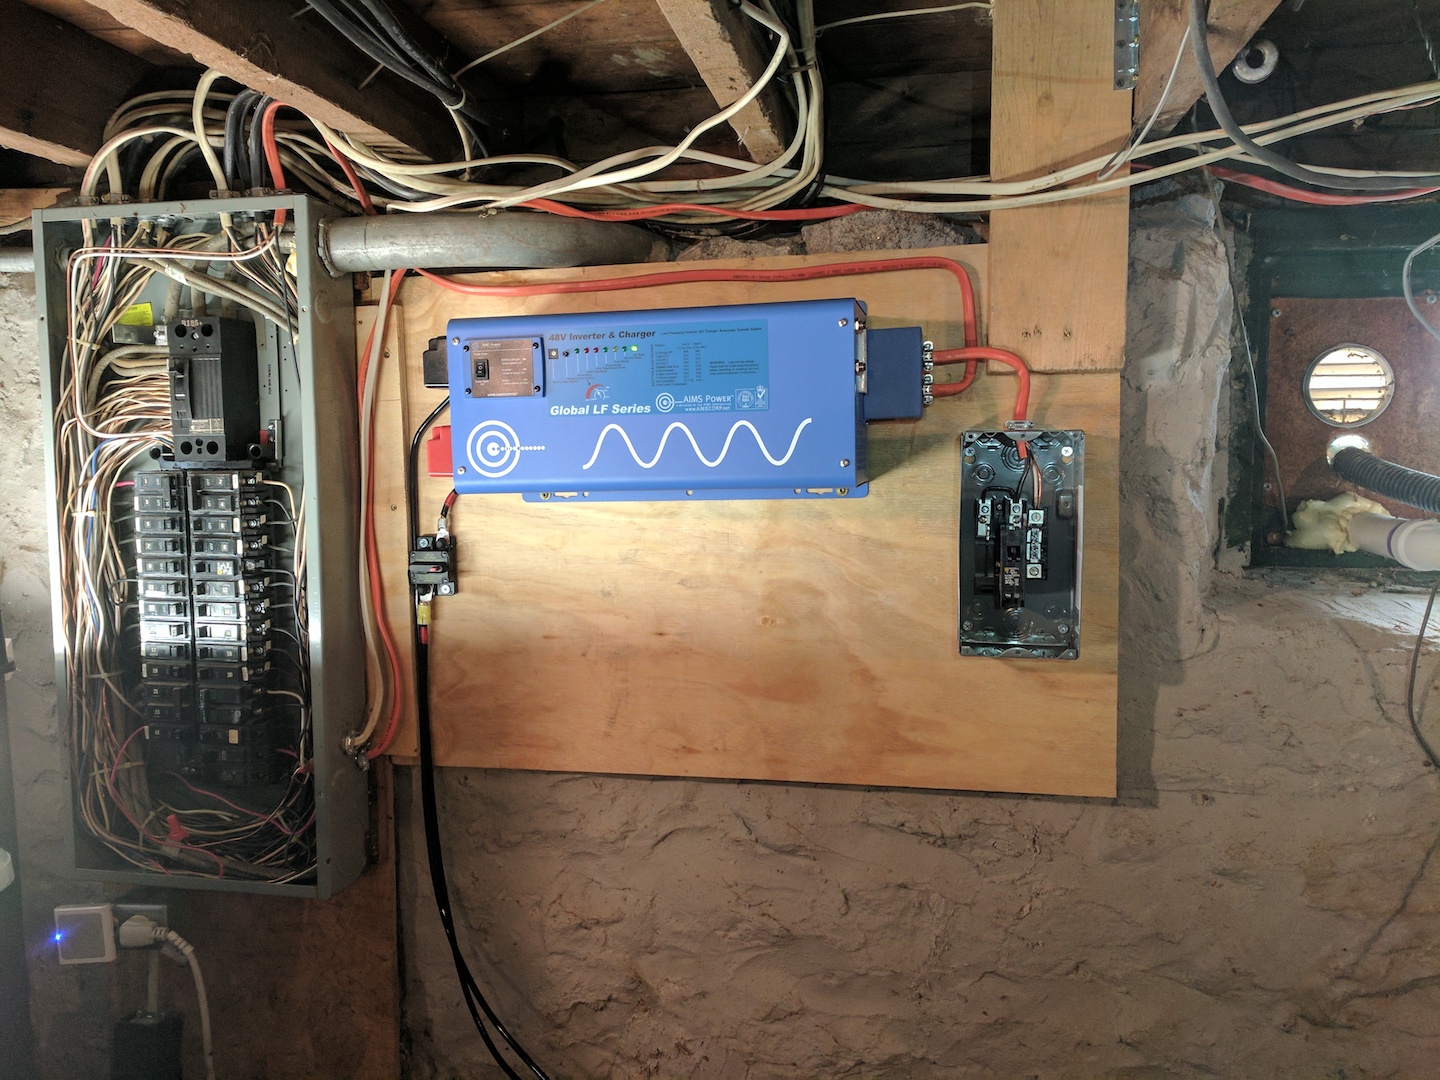
I started my research by looking at inverters. I wanted to leave room for growth, so I primarily focused on the 1500-2000 watt range. I also didn’t want to have massive cabling for a battery pack and wasn’t sure how much I wanted to invest in large batteries, so I looked for inverters running on 24-48 volts and skipped over anything in the 12 volt category. Other features I had in mind included pure sine wave output, AC connection with automatic failover, and battery charging for grid-assist functionality. With all these aspects in mind, I came across AIMS Power’s line of inverter/chargers. Much reading of user manuals and comparisons with other models later, I settled on the 48 volt, 2000 watt model (PICOGLF20W48V120VR). This allows me to have a hard-wired charger that can do AC pass-through with automatic failover, or run on battery/solar and only provide supplemental charge from the grid when the batteries get too low.
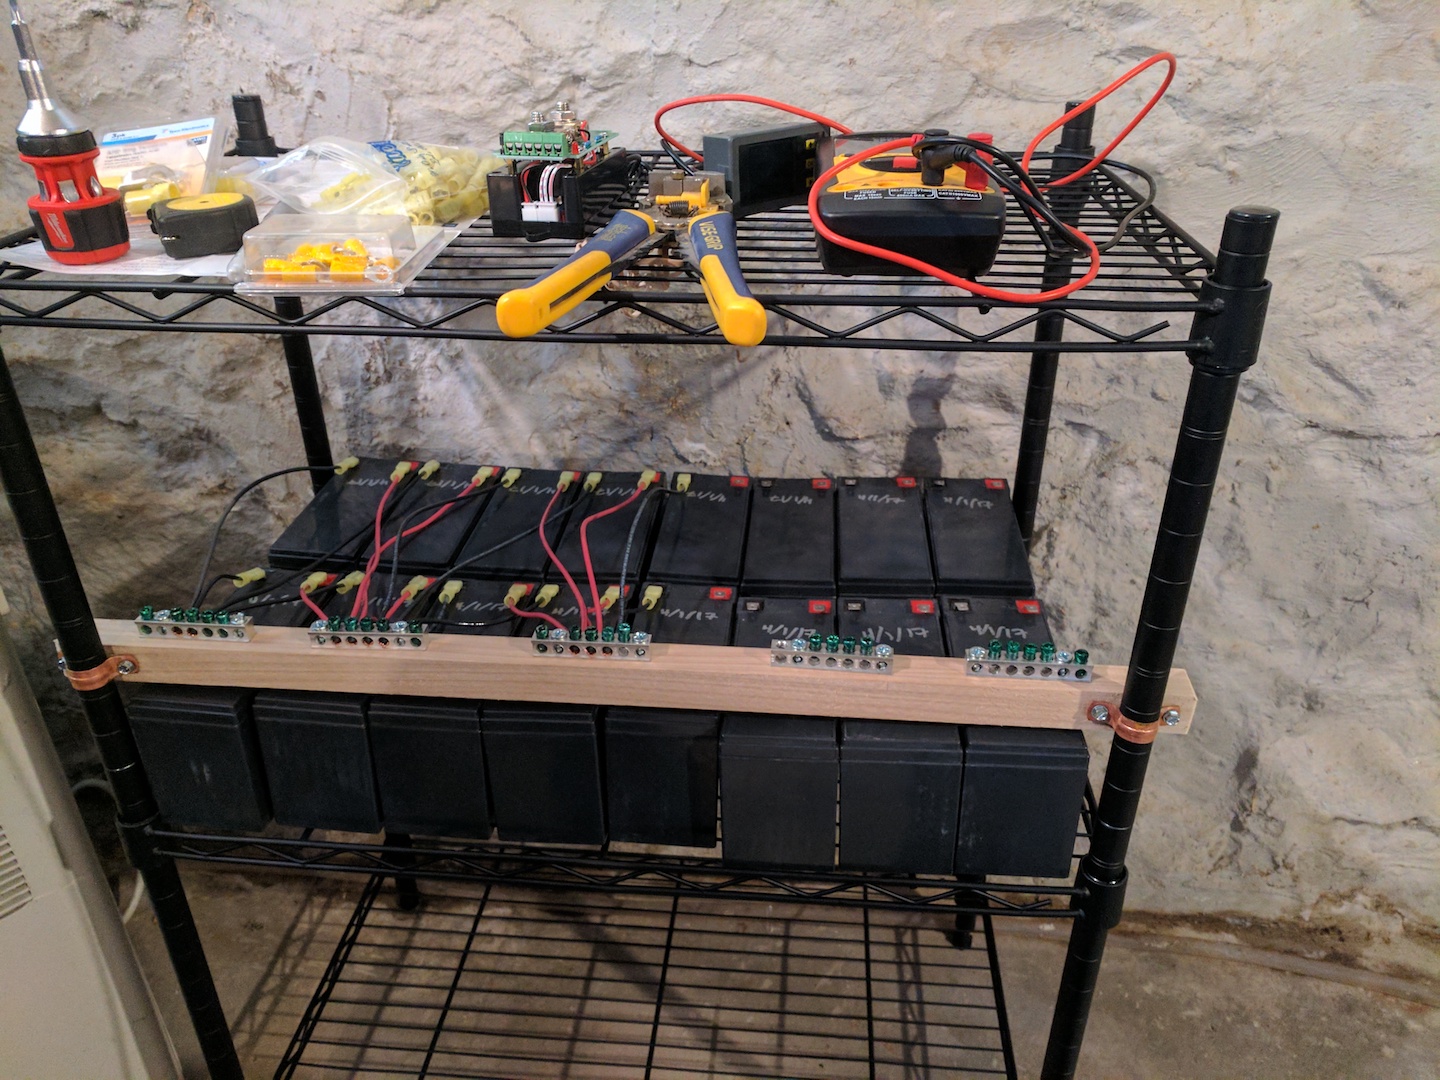
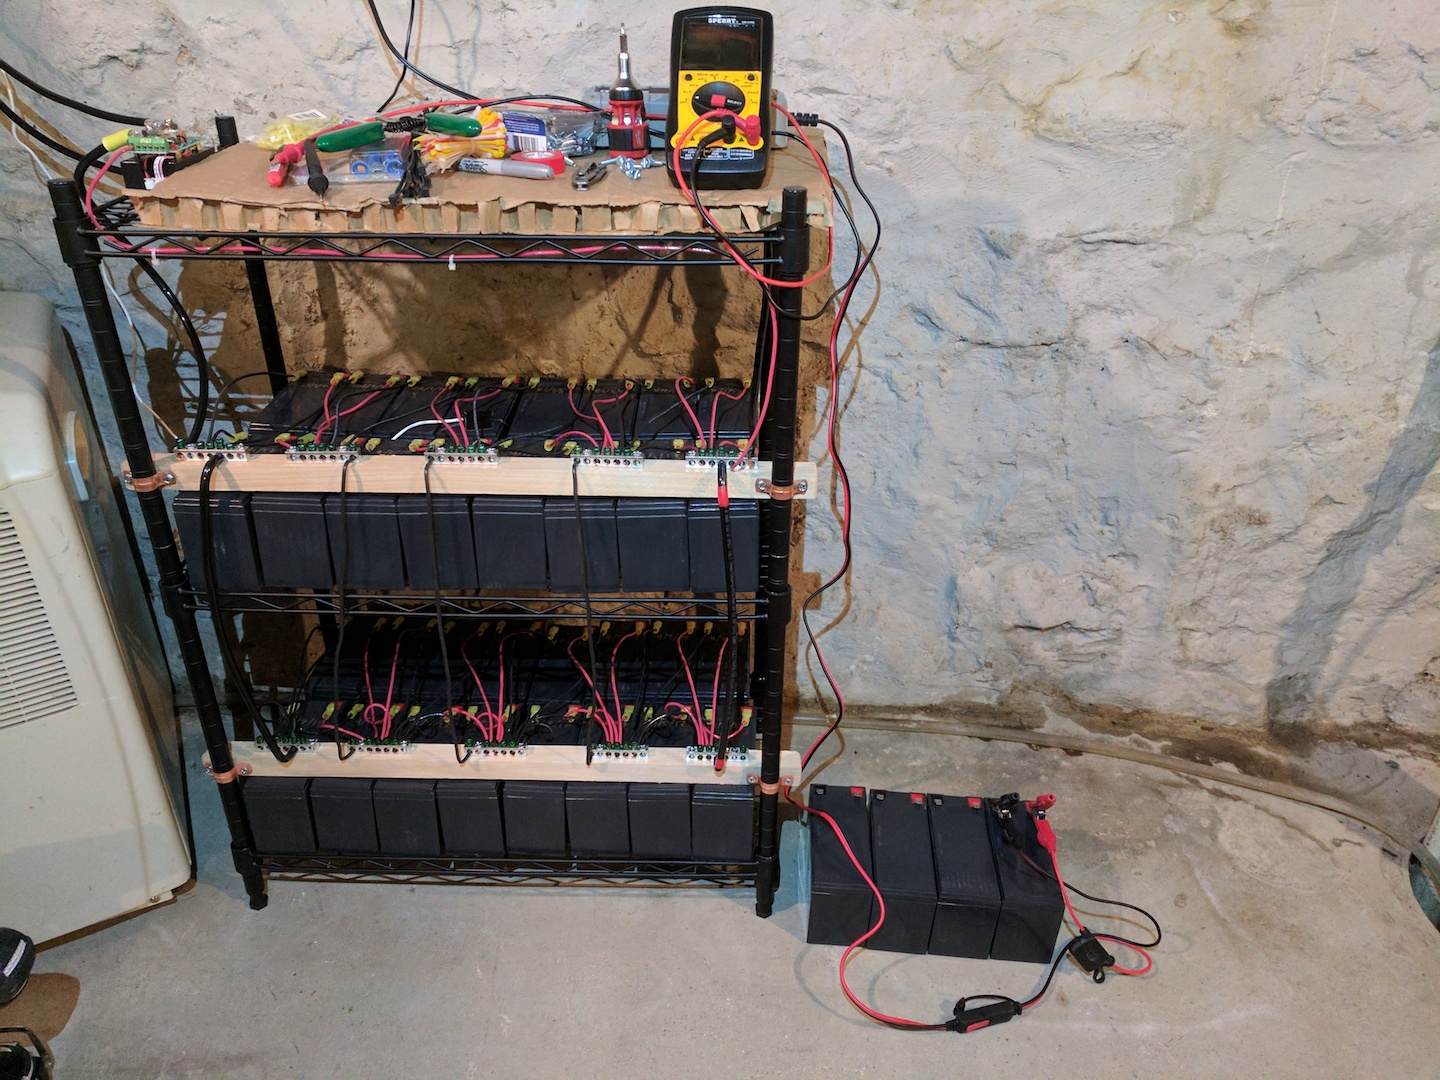
The next thing I researched was batteries. There are a lot of choices here, starting with what battery chemistry you want to use. I like lithium-based batteries and have used them for other projects, but the initial investment per watt-hour is several times that of lead-acid batteries. This article from altenergymag is several years old, but has plenty of useful information about various battery chemistries. I was able to find 12v 9Ah sealed lead-acid batteries for quite cheap, so I bought a bunch of them to put in 4 sets of parallel banks in series to get 48v. It is more ideal to have 4 large flooded lead-acid batteries in series, but this is something of an experiment after all. It’s a good start, although I may expand it if my needs increase.
I also picked up a DC circuit breaker and a nifty multimeter to keep an eye on the battery bank.
Stay tuned for details on the panels and charge controller! (and of course, data logging)


Hello!!!
Interesting installation – and one that I’m iterating towards myself, but I am currently hung up on the automatic transfer switching.
My reading of the manual for the AIMS inverter led me to believe that the failover switching only worked if the grid AC dropped – then the inverter would automatically switch from Standby to Invert. Of course, this is the exact opposite of what I want…… I need the Invert mode to have priority and switch to AC failover when the battery bank starts to drop
But it seems that you have been able to get it to work in the mode that I’d like to use. Is this mode an undocumented feature? Or did I just not read the manual carefully enough……
Also, do you have experience of how the switch from battery/inverter to grid AC affects computers? The switch time is supposed to be 10ms but I have no idea if a desktop computer (without UPS) would stay up during the switchover or not.
Thanks in advance for your help, and congratulations on the installation!!!!
Doug
Hi Doug!
It isn’t very prominent in the manual, but there is a DIP switch (SW5) that toggles between AC and battery priority. It’s also worth noting that SW1 (Low Battery Trip Point) will affect the low battery voltage at which the inverter transfers back to AC despite being in battery priority mode.
As for the transfer time, I haven’t had any of my electronics drop out during the switchover. That includes two computers, a TV, and a sound-bar. It is slightly noticeable in my cheaper LED bulbs as a momentary flicker, but even that is pretty easy to miss. I also haven’t measured the transfer time, but I am tempted to hook an oscilloscope up to it now and see what the transfer point looks like.
-Mitchel